
Co-authored by Minerva.
AI-assisted writing was used to improve clarity and structure; all technical viewpoints and conclusions are independently validated by the author.
Introduction: From Blueprint to Reality
In Part 2, we drew the map. We talked about Proxmox as your compute landlord, OPNsense as your paranoid network bouncer, and TrueNAS as the vault for everything that matters. We built a mental model of a homelab that doesn’t slowly rot into an unmaintainable mess.
Now comes the hard part: actually building the damn thing.
This isn’t a step-by-step “click here, then click there” tutorial. Those exist everywhere, and they’ll be outdated in six months anyway. This is about the strategic decisions that separate a homelab you’ll maintain for years from one you’ll rage-quit after the third inexplicable failure.
We’re going to talk about:
- Installing Proxmox and OPNsense the right way (not the easy way)
- Setting up VLANs so your network doesn’t look like a bowl of spaghetti
- Automating updates without waking up to a smoking crater
- Building a monitoring system that actually helps instead of just screaming at you
- Hardening security so you can sleep at night
Let’s get our hands dirty.
Installing Proxmox: The Right Foundation
The Mindset Before the Install
Here’s the thing about Proxmox: the installation wizard is too easy. You can click through it in five minutes, and you’ll have a “working” system. But working and correct are two very different things.
A bad Proxmox install is like building a house on sand. Everything looks fine until you try to do something serious, and then the cracks start showing. Networking gets weird. Storage behaves strangely. Backups fail in mysterious ways.
The Golden Rules:
-
Use a dedicated drive for Proxmox itself. Don’t mix your hypervisor OS with your VM storage. A small SSD (even 120GB) is perfect. Keep it separate, keep it simple.
-
Plan your network interfaces before you install. Know which physical network port will be your management interface, which will handle VM traffic, and which (if any) will be for storage. Write it down. Label your cables. Future you will thank present you.
-
Use the defaults for almost everything, except when you shouldn’t. The Proxmox installer is generally smart. Don’t get clever with partition layouts unless you really know what you’re doing. The one exception: if you have multiple drives, explicitly choose which one gets Proxmox.
Post-Install: The Stuff That Actually Matters
Once Proxmox is installed and you can reach the web interface, resist the urge to immediately start creating VMs. Do this first:
1. Disable the Enterprise Repository (Unless You’re Paying)
Proxmox will yell at you about updates if you don’t have a subscription. Fair enough—they need to eat. But for a homelab, the community repository is perfectly fine.
# SSH into your Proxmox host
# Comment out the enterprise repo
sed -i 's/^deb/#deb/' /etc/apt/sources.list.d/pve-enterprise.list

# Add the no-subscription repo
echo "deb http://download.proxmox.com/debian/pve bookworm pve-no-subscription" > /etc/apt/sources.list.d/pve-no-subscription.list

# Update
apt update && apt upgrade -y
2. Set Up Automated Updates (With a Safety Net)
Updates are good. Blindly automated updates that break production on a Tuesday morning are bad. The trick is automation with rollback capability.
Install unattended-upgrades:
apt install unattended-upgrades apt-listchanges -y
dpkg-reconfigure -plow unattended-upgrades
Edit /etc/apt/apt.conf.d/50unattended-upgrades and be picky about what auto-updates:
// Only auto-update security patches and Proxmox stable updates
Unattended-Upgrade::Origins-Pattern {
    "origin=Debian,codename=${distro_codename},label=Debian-Security";
    "origin=Proxmox,codename=${distro_codename}";
};

// Don't auto-reboot. You should control when that happens.
Unattended-Upgrade::Automatic-Reboot "false";
This setup will patch security holes automatically but won’t surprise you with a random reboot. You’ll still need to manually apply kernel updates and reboot on your own schedule—weekly or monthly works fine.
Danger
Pro Tip: Before any major update, take a snapshot of your critical VMs. Proxmox makes this trivial. Click, snapshot, done. If the update breaks something, you can roll back in seconds.
3. Configure Email Alerts
Proxmox can send you emails when things go sideways. Don’t skip this. You want to know when a disk is failing before it takes your data with it.
apt install postfix mailutils -y
# Choose "Internet Site" and set your hostname
Test it:
echo "Proxmox is alive" | mail -s "Test from Proxmox" your@email.comIf you don’t get that email, troubleshoot now. A monitoring system that doesn’t actually alert you is just expensive wall decoration.
For a deeper dive on the Proxmox installation process, Learn Linux TV’s Proxmox Guide is solid. He covers the basics without the fluff.
OPNsense: Building Your Digital Moat
Why OPNsense (or pfSense) Isn’t Optional
Let me be clear: if you’re exposing anything to the internet without a real firewall, you’re not self-hosting. You’re just running a very slow honeypot.
Your ISP router is not a firewall. It’s a consumer appliance designed to get grandma’s iPad online. OPNsense is an actual, professional-grade firewall that happens to be free — no surprise paywalls, no sudden “enterprise-only” features, no drama 🤞. I’m on OPNsense myself and it’s been serving me well so far, which is always a good sign. And hey, if you’re shopping for “enterprise-grade,” both OPNsense and pfSense have commercial offerings — just bring your wallet and your patience.
The Install Strategy
Ideally, OPNsense runs on its own dedicated hardware. A separate box as your firewall is still the gold standard — better isolation, fewer moving parts, and fewer “oops, I rebooted my hypervisor and took the internet with it” moments. I personally run it this way, and it’s been rock solid.
If you’re looking for this kind of setup, there are plenty of mini PCs available in the second-hand market that can serve you extremely well. I’m using a Lenovo ThinkCentre M93p myself, and it’s been more than capable for the job.
That said, if you’re working with budget or space constraints, running OPNsense as a VM on Proxmox is a perfectly valid and widely used approach. Yes, it feels weird at first — your firewall is “inside” the thing it’s protecting — but this is how many homelabs do it, and it works beautifully when set up correctly.
The Two-Interface Minimum:
- WAN Interface: This connects to your modem/ISP. This is the scary internet-facing side.
- LAN Interface: This connects to your internal network (or multiple VLANs, but we’ll get there).
Critical Setup Steps:
- Download the OPNsense ISO and upload it to Proxmox.
- Create a new VM with at least 2GB RAM, 20GB disk, and two network interfaces.
- Boot and install. The installer will ask you to assign WAN and LAN. Don’t mess this up. WAN is the one that goes to your modem. LAN is everything else.
- Access the web interface from a device on your LAN at the IP OPNsense assigns itself (usually
192.168.1.1).
Sheridan Computers has an excellent OPNsense install video that covers the basics without assuming you have a CCNA.
First Firewall Rules: Default Deny Everything
Out of the box, OPNsense is permissive on the LAN side. It trusts your internal network. This is fine for day one, but you need to develop a more paranoid mindset.
The Philosophy:
- Block everything by default.
- Explicitly allow only what you need.
- Log the denials so you can see what’s trying to happen.
Start with a simple ruleset:
- Allow LAN to WAN (so your devices can reach the internet).
- Block everything from WAN to LAN (nothing from the internet gets in unless you explicitly allow it).
- Allow specific ports only when you’ve set up a service and tested it internally first.
You’ll refine this over time, but the key is to start locked down and open things incrementally. The opposite approach (start open, lock down later) never actually happens.
VLANs: Segmenting Your Network Without Losing Your Mind
The Problem VLANs Solve
Imagine your homelab as a big house party. Right now, everyone’s in the same room: your laptop, your sketchy IoT lightbulbs, your Plex server, and that experimental web app you downloaded from some random GitHub repo.
One of those devices gets compromised. Guess what? The attacker can now see everything on your network. Your NAS, your firewall admin panel, your personal computer. It’s a digital free-for-all.
VLANs are walls. They divide your network into separate rooms. The compromised lightbulb can flail around all it wants in its own room, but it can’t wander over to where your important stuff lives.
The Starter VLAN Setup
Remember from Part 2, we want at least these:
- VLAN 10 (LAN): Your trusted devices. Laptops, phones, desktops.
- VLAN 20 (SERVICES): Internal-only services. AdGuard, Nextcloud, your dashboard.
- VLAN 30 (DMZ): Anything that faces the internet. Web servers, reverse proxies.
- VLAN 99 (MGMT): The crown jewels. Proxmox, TrueNAS, OPNsense admin panels.
- VLAN 100-110 (VPNs): For VPN services used for geolocation, traffic routing, or region-specific access.
Mandatory Hardware: A Managed Switch
You cannot do VLANs properly without a managed switch. Your cheap $20 unmanaged switch won’t cut it. You need something that can tag VLAN traffic. A basic managed switch from TP-Link, Netgear, or Ubiquiti will run you back a few monies. It’s worth every penny.
Configuring VLANs in OPNsense
- Interfaces → Other Types → VLAN: Create a VLAN for each segment. Tag them with the numbers above (10, 20, 30, 99).
- Interfaces → Assignments: Assign each VLAN to a new interface and enable it.
- Firewall → Rules: This is where the magic happens.
Example Ruleset for VLAN 20 (SERVICES):
- Allow SERVICES to access the internet (so your services can fetch updates).
- Allow LAN (VLAN 10) to access SERVICES (so you can use them).
- Block SERVICES from accessing LAN or MGMT (services shouldn’t initiate connections to your personal devices or admin panels).
This is the “least privilege” principle in action. Each network segment can only talk to what it absolutely needs to.
Danger
Pro Tip: Start with just two VLANs (LAN and IoT) to get the hang of it. Once you’re comfortable, add SERVICES and DMZ. MGMT can come last—it’s advanced paranoia, but good paranoia.
For a visual walkthrough of VLAN setup in OPNsense, this video by Netgate is a solid reference (it’s for pfSense, but the concepts are identical).
Backups and Restore: Turning Theory Into Practice
We talked about the 3-2-1 rule in Part 2. Now let’s make it real.
Proxmox Backup Server (PBS)
PBS is Proxmox’s dedicated backup solution, and it’s criminally underrated. It does incremental backups, deduplication, and verification. Translation: your backups are fast, small, and you can actually trust them.
Setup Strategy:
- Spin up a separate VM or LXC container for PBS. Don’t back up to the same physical drives Proxmox is running on—that defeats the point.
- Point PBS to external storage. A USB drive, a NAS, anything that’s not the same disk your VMs live on.
- Schedule backups in Proxmox to run nightly. Pick a time when your services aren’t busy (3 AM is the classic choice for a reason).
Test Your Restores:
Set a calendar reminder for the first Sunday of every quarter: “Restore Test Day.” Pick a random backup and restore it to a new VM. If you can’t restore it, your backup strategy is a lie you’ve been telling yourself.
# In PBS, you can manually trigger a restore to verify
# Or in Proxmox, restore a VM from a backup to a new VM ID
# Boot it. Does it work? Congratulations, your backups are real.
Off-Site with Rclone
PBS handles local backups. For off-site, you need rclone. It’s a Swiss Army knife for moving data to cloud storage.
# Install rclone
curl https://rclone.org/install.sh | sudo bash

# Configure a remote (interactive wizard)
rclone config

# Example: Sync critical data to Backblaze B2
rclone sync /path/to/critical/data b2:your-bucket-name --progress
Encrypt your backups before they leave your network. You’re trusting a cloud provider with your data—don’t also trust them with your encryption keys.
# Use rclone's built-in encryption
rclone config # Set up a "crypt" remote on top of your B2 remote
Run this weekly via cron. Not daily—off-site backups are for disaster recovery, not versioning.
Monitoring: What Deserves Your Attention (and What Doesn’t)
The Monitoring Trap
Most people approach monitoring like this: “I’ll monitor everything, and then I’ll know when something’s wrong!”
Two weeks later, they’re drowning in alerts, ignoring all of them, and their actual critical service is down and they didn’t even notice because the alert got lost in the noise.
The Philosophy:
Monitor what matters. Ignore what doesn’t. Be ruthless about this.
The way I do it is simple: I run two Telegram channels (Ideally I will prefer this channel to be empty):
- One for serious alerts:
- “Unknown IP logged in via SSH”
- “Root login detected”
- “Backup failed”
- “Disk corruption detected”
Translation: drop everything, this is real.
- And one for normal / low alerts:
- “Memory usage at 80%”
- “CPU spiked for 12 seconds”
- “Disk is 75% full”
- “Load average looks spicy”
Translation: Yes, thank you. I am alive. Please calm down.
When your monitoring screams about everything, you eventually listen to nothing. Train it like a guard dog, not a car alarm.
What Deserves a 3 AM Wake-Up Call
- Critical services are down. Your Nextcloud VM is unreachable. Your firewall is offline. Your NAS stopped responding.
- Disk failure is imminent. A drive is throwing SMART errors. ZFS detected corruption it couldn’t fix.
- Security breach indicators. Unusual login attempts, firewall rules being modified, a VM’s resource usage spiking 10x for no reason.
What Can Wait Until Morning
- A service restarted. If it’s back up, you don’t need to panic.
- Disk space is at 70%. Annoying, not urgent. You’ll deal with it over coffee.
- An update is available. Cool. You’ll get to it this weekend.
The Uptime Kuma Approach
Uptime Kuma is a self-hosted monitoring tool that’s refreshingly simple. It checks if your services are up, and it yells at you (via notifications) if they’re not.
Why Uptime Kuma?
- Dead simple to set up (runs in Docker/LXC).
- Supports tons of notification channels (Discord, Telegram, email, Pushover, etc.).
- Pretty dashboard that you’ll actually want to look at.
What to Monitor:
- Service endpoints: Is your Nextcloud returning HTTP 200? Is your Jellyfin responding?
- Host uptime: Ping your Proxmox host, your firewall, your NAS.
- Certificate expiration: Nothing ruins your day like an expired TLS cert.
# Example Uptime Kuma check for Nextcloud
Name: Nextcloud
URL: https://nextcloud.your-awesome-domain.com
Interval: 60 seconds
Alert if down for: 2 minutes (avoids false alarms from brief hiccups)
The Notification Strategy:
- Critical alerts (services down, disk failures) → Instant push notification to your phone.
- Warnings (high CPU, disk at 80%) → Email summary once per day.
- Info (update available, backup completed) → Dashboard only, no notification.
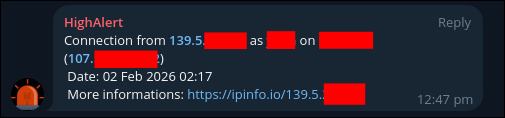
An example alert: 🚨 Someone just logged into a server that theoretically only I should have access to. This is either me … or Houstan we have a problem.
Danger
Pro Tip: Use notification rate limiting. If a service is flapping (up, down, up, down), you don’t want 50 alerts in 10 minutes. Configure Uptime Kuma to alert once, then wait an hour before alerting again.
For other monitoring philosophies, Grafana + Prometheus is the “enterprise” approach—more powerful, more complex. TechnoTim’s video on Grafana is a good starting point if Uptime Kuma feels too simple.
Automation: Updates Without the Explosions
The Update Paradox
Not updating is dangerous. Your services have known vulnerabilities, and attackers have automated scanners looking for exactly those holes.
But blindly auto-updating is also dangerous. An update breaks your service at 2 AM, and now you’re bleary-eyed, trying to debug why Nextcloud won’t start.
The answer? Automation with guard rails.
Proxmox Updates: Already Covered
We set up unattended-upgrades earlier. It patches security holes but doesn’t auto-reboot. You stay in control of when your host goes down.
VM/LXC Updates: Ansible to the Rescue
For your VMs and containers, use Ansible. It’s a tool that lets you define “this is what my system should look like,” and then it makes it so.
Why Ansible?
- You can run the same update playbook on 10 VMs at once.
- You can test updates on a non-critical VM first.
- You have a written record (your playbook) of exactly what got changed.
Example Playbook (update all Ubuntu VMs):
---
- name: Update all Ubuntu VMs
  hosts: ubuntu_vms
  become: yes
  tasks:
    - name: Update apt cache
      apt:
        update_cache: yes

    - name: Upgrade all packages
      apt:
        upgrade: dist

    - name: Remove unused packages
      apt:
        autoremove: yes

    - name: Check if reboot required
      stat:
        path: /var/run/reboot-required
      register: reboot_required

    - name: Notify if reboot needed
      debug:
        msg: "Reboot required for {{ inventory_hostname }}"
      when: reboot_required.stat.exists
Run this weekly via cron. It updates everything, but it doesn’t auto-reboot. You decide when to reboot based on the notification.
The Testing Strategy:
- Run updates on your non-critical “lab” VMs first (Friday night).
- If they survive the weekend, roll out to production VMs (Monday night).
- If something breaks, you have the weekend to fix it without affecting your daily workflow.
LearnLinuxTV has a great Ansible crash course that’ll get you up to speed fast.
Docker Container Updates: Watchtower (With Caution)
If you’re running services in Docker, Watchtower can auto-update containers. But use it carefully.
# docker-compose.yml snippet
watchtower:
  image: containrrr/watchtower
  volumes:
    - /var/run/docker.sock:/var/run/docker.sock
  environment:
    - WATCHTOWER_CLEANUP=true
    - WATCHTOWER_SCHEDULE=0 0 3 * * SUN  # 3 AM every Sunday
    - WATCHTOWER_NOTIFICATIONS=email
    - WATCHTOWER_NOTIFICATION_EMAIL_TO=you@example.com
Tip
I have moved from watchtower to DockHand for all my services. Its … just easier. However, the principle still applies.
Danger
Pro Tip: Exclude critical containers from Watchtower. Update those manually. You don’t want your reverse proxy to auto-update and break SSL at 3 AM on a work night.
Hardening Proxmox: The Essentials
Why Proxmox Security Matters
Proxmox is the keys to the kingdom. If someone gets root access to your Proxmox host, they own everything: every VM, every password, every piece of data.
The Non-Negotiables:
1. Disable Root SSH Login
Edit /etc/ssh/sshd_config:
PermitRootLogin no
PasswordAuthentication no  # Force SSH keys only
Restart SSH:
systemctl restart sshdCreate a non-root user for yourself and give it sudo access. Always SSH in as that user, then sudo when you need root.
2. Enable Two-Factor Authentication
Proxmox supports TOTP (the same 6-digit codes your banking app uses).
# Install libpam-google-authenticator
apt install libpam-google-authenticator -y

# Run as your user (not root)
google-authenticator
Follow the prompts. Scan the QR code with your phone’s authenticator app. Now every login requires your password and a code from your phone.
3. Firewall the Management Interface
If you set up VLAN 99 (MGMT), move your Proxmox management interface there. Only devices on VLAN 99 can reach the web UI.
In OPNsense, create a firewall rule:
- Block all access to Proxmox’s port 8006 from VLANs 10, 20, 30.
- Allow access only from VLAN 99.
Now even if an attacker compromises a VM, they can’t reach your hypervisor’s admin panel.
4. Audit Logs Regularly
Proxmox logs everything. Who logged in, when, what they did.
# Check auth logs
cat /var/log/auth.log | grep "Failed password"

# Check Proxmox task logs in the web UI
# Datacenter → Tasks
If you see login attempts from IPs you don’t recognize, you have a problem. Investigate immediately.
VirtualizationHowTo’s video on Proxmox Security Hardening goes deeper into advanced hardening.
Hardening OPNsense: Your First Line of Defense
The Firewall is Your Moat
OPNsense sits between the scary internet and everything you care about. If it’s not configured correctly, you’re basically running your homelab with the front door wide open.
The Core Hardening Steps:
1. Change the Default Admin Password (Obvious, But Do It)
Default credentials are the #1 way homelabs get owned. Change it. Now. Make it long and random.
2. Restrict Admin Access
By default, OPNsense’s web interface is reachable from the LAN — and sometimes (thanks to creative misconfiguration) from places it really shouldn’t be, like the WAN. Surprise! You’ve invented “public firewall management.” Lock it down.
- System → Settings → Administration
- Listen Interfaces: Choose only your MGMT VLAN (VLAN 99).
- HTTP Redirect: Disable. HTTPS only.
Now only devices on your management VLAN can reach the firewall’s admin panel.
3. Enable Automatic Backups
OPNsense can automatically back up its configuration to a remote location.
- System → Configuration → Backups
- Set up automatic backups to an external location (via SFTP, for example).
If your firewall config gets corrupted, you can restore from backup instead of rebuilding from scratch.
4. Enable Intrusion Detection (Suricata)
Suricata is an IDS/IPS that watches your network traffic for suspicious patterns.
- Services → Intrusion Detection → Administration
- Enable IPS mode (it blocks threats, not just alerts).
- Subscribe to rulesets (ET Open is free and good).
Warning: Suricata can be a resource hog. If your firewall VM is underpowered, it’ll slow things down. Start with IDS mode (monitor only), and if you have CPU to spare, switch to IPS.
5. Regular Firmware Updates
OPNsense releases security updates frequently. Check for updates weekly.
- System → Firmware → Updates
You can even automate this (carefully) by enabling auto-updates for security patches only.
Danger
Pro Tip: Before major OPNsense updates, export a backup of your config. If the update breaks something, you can restore and roll back.
SysAdmin102 has a nice playlist on OpnSense hardening that covers advanced topics like GeoIP blocking and threat intelligence feeds.
Putting It All Together: A Week in the Life
So what does maintaining this setup actually look like?
Sunday Morning (30 minutes):
- Check your Uptime Kuma dashboard. Everything green? Good.
- Check Proxmox task logs. Any failed backups? Investigate.
- Glance at your firewall logs in OPNsense. Any weird traffic? Probably just bots, but worth a look.
Once a Month (1 hour):
- SSH into Proxmox and run
apt update && apt upgrade. Reboot if a kernel update was installed. - Check for OPNsense firmware updates. Apply them.
- Review your backup restore logs. When was the last time you tested a restore? If it’s been more than 3 months, do it now.
Once a Quarter (2 hours):
- Restore Test Day. Pick a random VM backup and restore it. Does it boot? Does it work? Great, your backups are real.
- Review your firewall rules. Are there any you’re not using anymore? Clean them up.
- Check disk health on all your VMs and hosts. ZFS status, SMART data, the works.
When Something Breaks (Variable):
- Check monitoring first. What failed?
- Check logs. Proxmox task log, OPNsense system log, the specific service’s log.
- Restore from backup if it’s faster than debugging.
This isn’t zero maintenance, but it’s predictable maintenance. No surprises. No 3 AM panic attacks because everything’s on fire and you don’t know why.
Conclusion: You’re Done. Now Go Build.
That’s it. Three parts, and we’ve gone from “why self-host” to “here’s how to build infrastructure that won’t collapse under its own weight.”
- Part 1 was the wake-up call. Self-hosting isn’t just a hobby—it’s taking back control of your digital life.
- Part 2 was the blueprint. We mapped out the foundation: Proxmox for compute, TrueNAS for storage, OPNsense for security, and VLANs to keep the chaos contained.
- Part 3 was the build. We installed Proxmox and OPNsense the right way, set up network segmentation, automated updates without losing control, built monitoring that doesn’t just scream into the void, and hardened the pieces that matter most.
You now have everything you need to build a homelab that’s not just functional, but survivable. One that you can maintain without it consuming your life. One that won’t quietly rot into an undocumented, fragile mess.
The goal was never perfection. It’s resilience. It’s knowing that when something breaks—and it will—you have backups, you have monitoring, and you have a plan. It’s building something boring enough to be reliable, but interesting enough to teach you something every time you touch it.
You don’t need the fanciest hardware. You don’t need a rack full of enterprise gear. You don’t need to be a seasoned sysadmin. You just need to start with a solid foundation, make intentional decisions, and resist the urge to over-complicate things.
Build boring infrastructure. Maintain it like you actually want it to last. Sleep well at night.
Now stop reading and go build something. Happy and Safe Selfhosting.
Previously, on “How Not to Break Your Homelab”: